LookFar Labs14 July 2016
Designing in the browser using Gulp, Slush, Bootstrap 4 & Sass
Designing in the browser is a convenient way to prototype your product, quickly.
Being able to skip mocking up screens sounds very appealing, but depends highly upon what you’re building. Rather than discussing why and when you should design in the browser, this post will be a practical guide to setting up a workflow for prototyping in the browser using Gulp, Slush, Bootstrap 4, and Chrome DevTools.
TL;DR – What Are We Doing?
We will be using a scaffolding tool called Slush to get our project up and running with a generator made specifically for this tutorial called slush-prototyper. Slush uses Gulp to scaffold new project structures based off of generators made by the community. The generator in this tutorial comes with Sass, Sourcemaps, Bootstrap 4, jQuery, and Modernizr right out of the box.
This way, all you have to do is setup your workspace in Chrome DevTools and you are good to start prototyping directly in the browser. Let’s get started.
Step 1: Install The Tools & Create Project
If you haven’t already, you’ll need to install NodeJS. Otherwise open up a terminal and follow along.
Install Gulp. We’re going to need it for our actual project
npm install -g gulp
Install Slush.
npm install -g slush
Install the generator, slush-prototyper, that we’ve made for this tutorial.
npm install -g slush-prototyper
Create a new directory
mkdir project && cd project
Generate a new project with slush-prototyper. Here you’ll have the option to generate the project with or without Bootstrap and Modernizr.
slush prototyper
Now run the gulp task to start the server and have gulp watch your scss files for any changes
gulp serve
Step 2: Setup Chrome DevTools Workspace
Now that we have all the project setup and the server running, it’s time to setup our workspace so we can edit our scss files directly in the browser.
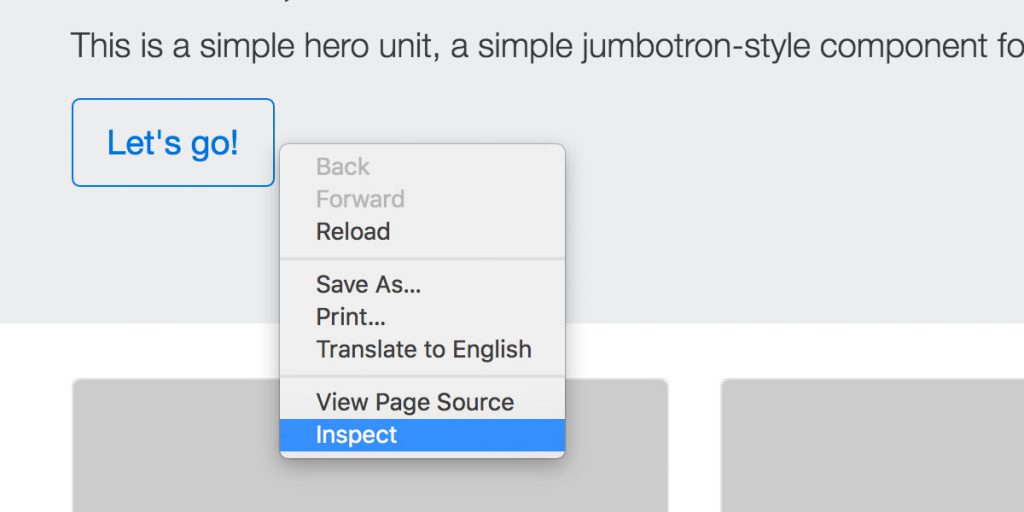
In your newly opened browser window, right click anywhere and inspect any element.
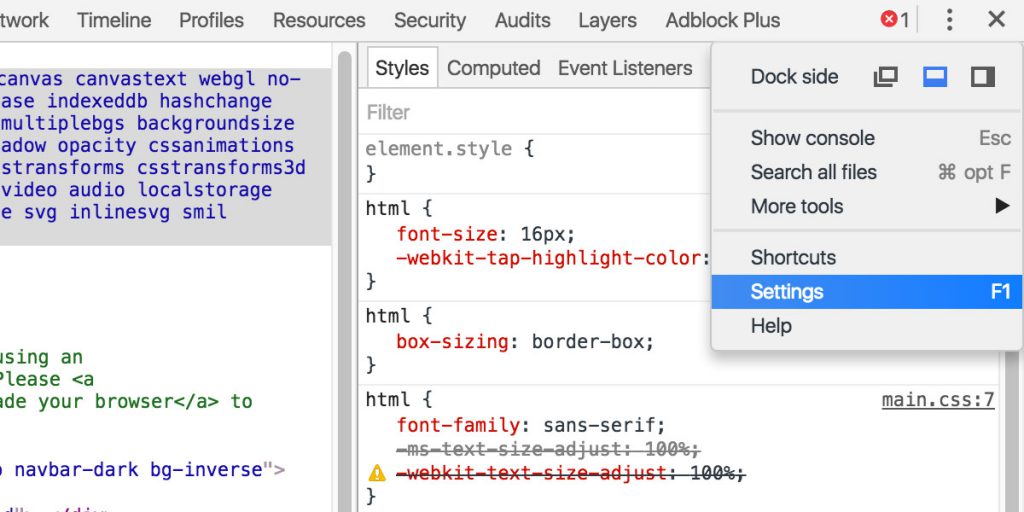
Click the three dots to view the Settings menu.
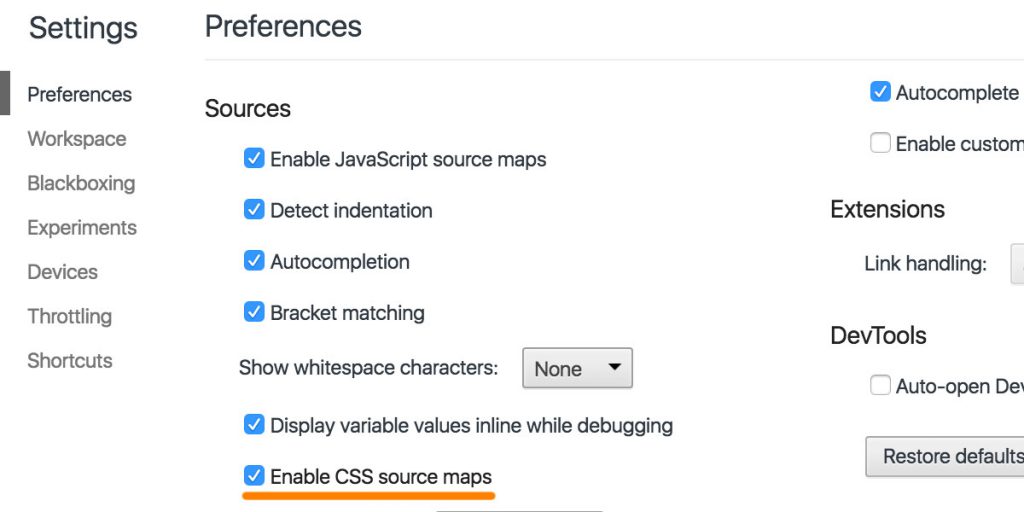
Let’s make sure to enable CSS sourcemaps, if you haven’t already.
Close settings and click onto the Sources tab. Right click in the left hand column and click “Add Folder to Workspace”. Navigate to the /app/ folder that slush-prototyper has generated.
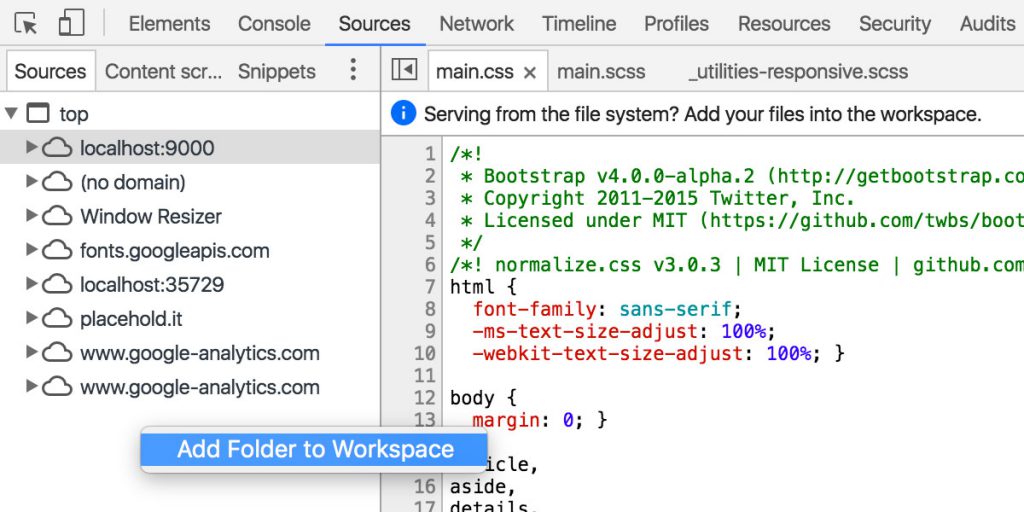
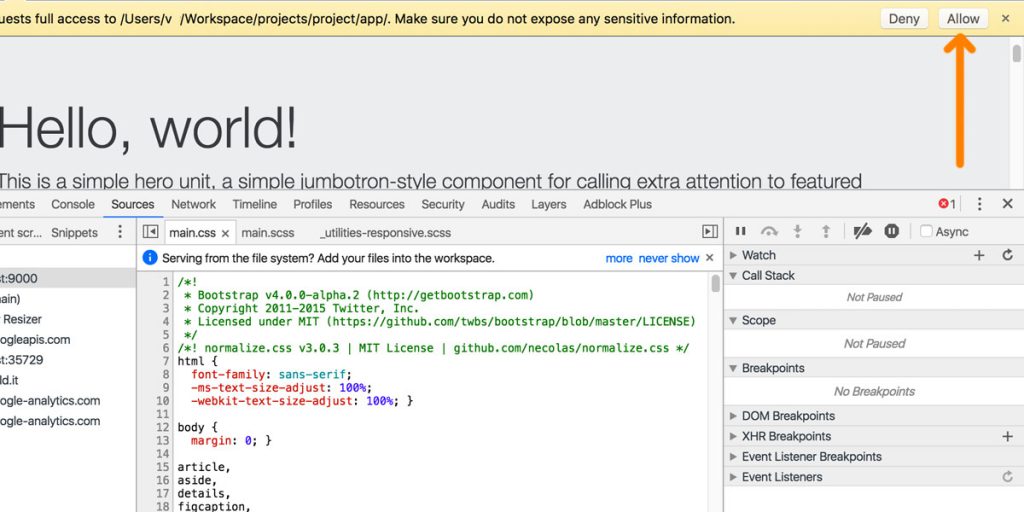
Once you’ve added the /app/ folder, you’ll have to confirm by clicking “Allow”.
Since slush-prototyper has set the scss files up with sourcemaps, all you have to do now is right click the main.scss file under source and map it as a file system resource.
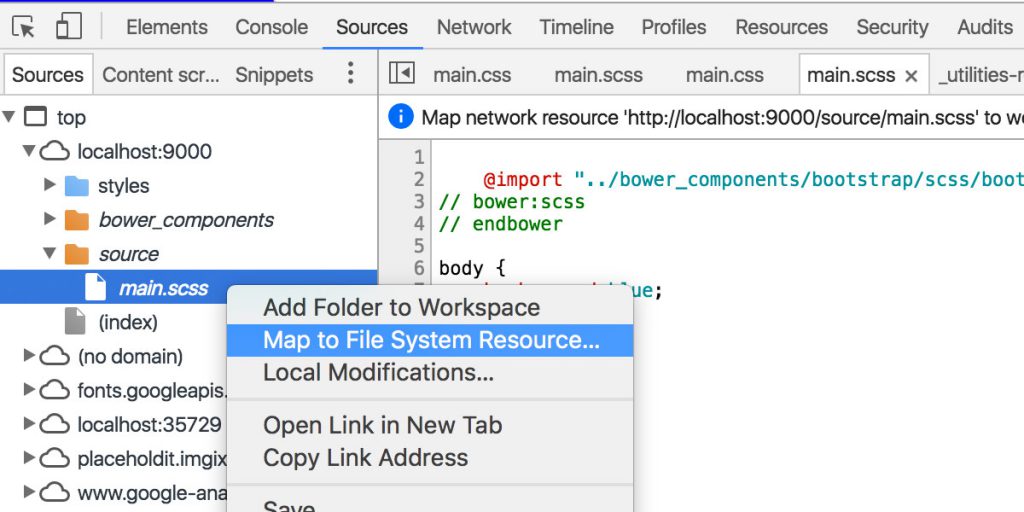
DevTools will do a pretty good job at detecting the file, but make sure it maps to app/styles/main.scss. Click it, and restart DevTools by refreshing. You may also map the (index) to index.html, if you would like to edit markup in DevTools.

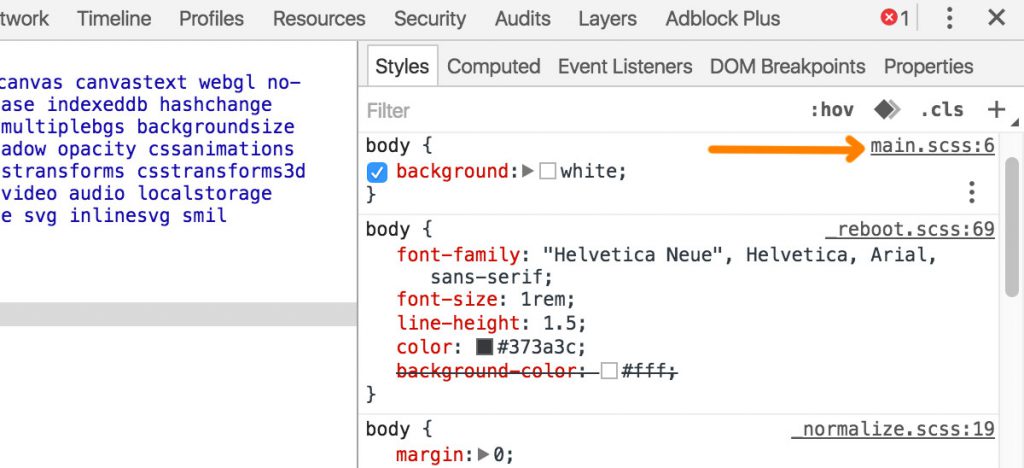
Click over to the elements tab and select the body as an example. By clicking the reference to the scss sheet we will be taken to the Sources tab where we can directly edit the styles.
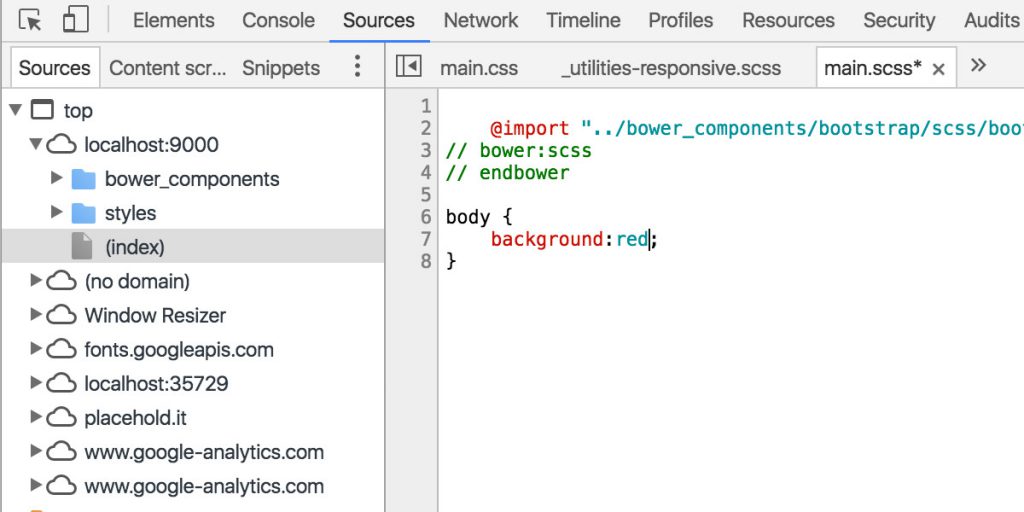
Try changing the styles and adding your own. When done, either right click on the tab and click save or press Command/Ctrl+S.
In your terminal you will see your changes are saved as gulp is watching your files.

Chrome will refresh almost immediately and you’ll see your changes in the browser.
(Optional) Install additional frontend libraries with Bower
This Slush generator comes with bower – meaning you can incorporate any other frontend tools by running the following.
bower install --save plugin-name-here
Wrapping Up
Whether you’re building a quick prototype, or updating an existing project, having the ability to edit directly in the browser is extremely helpful in saving time. We hope the framework provided in this post will help you get up and running on your next project.
Written by
 Signal-Based Selling FTW with Creative Service Agencies
  Build vs. Buy: Third Party or Custom-Developed Software